MX gateway and relay server integration for Postfix environments

Pitbull MX gateway for Postfix (Free, Linux/Unix) mail servers: inbound filtering, quarantine and outbound relay. Outbound traffic is routed through Pitbull relay via Postfix relayhost and SASL AUTH.

Postfix · Relay MX + Relay Server
Inbound MX ROUTED
Relay AKTİF
Filter RSPAMD
Abuse OBSERVE
Postfix Relay MX Gateway Rspamd NOC
Linux/Unix
Platform
Free
License
MX+Relay
Gateway model
KVKK
Local processing

Integration challenges

Pitbull solves mail security on this platform with the MX gateway model.

Limited native filtering

Postfix default spam protection is insufficient against advanced phishing and BEC attacks.

Outbound blind spot

Without relay configuration, outbound spam and abuse detection is delayed; IP reputation drops.

Missing central visibility

Hard to monitor traffic, quarantine and reject reasons from one point.

Scattered policy

Managing SPF/DKIM/DMARC and quarantine policies per server increases error risk.

Pitbull integration with Postfix

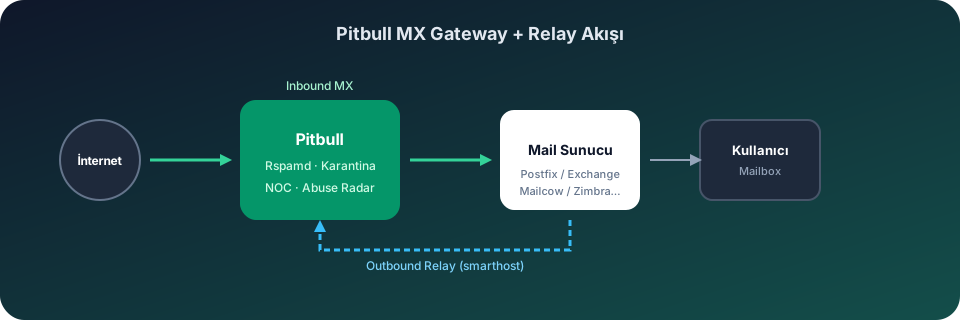
In environments using Postfix, Pitbull integration works on two channels:

  • Inbound: DNS MX records point to the Pitbull gateway; Rspamd-based filtering, quarantine and policy engine secure inbound traffic.
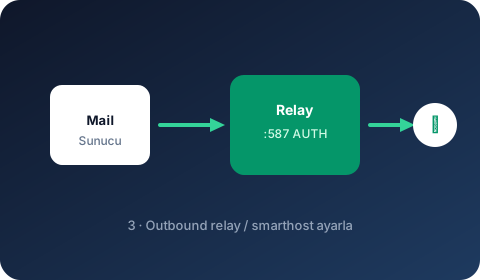
  • Outbound: Outbound traffic is routed through Pitbull relay via Postfix relayhost and SASL AUTH.

Relay Server Configuration

Postfix relay is configured in /etc/postfix/main.cf with relayhost, smtp_sasl_auth_enable and smtp_tls_security_level. Credentials are stored in /etc/postfix/sasl_passwd.

Inbound MX Gateway

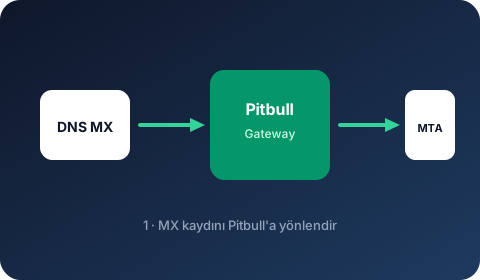
  • Point domain MX records to the Pitbull gateway address (priority 10)
  • Rspamd spam, phishing and malware filtering at the gateway layer
  • Malicious attachment scanning via ClamAV / Avast REST
  • SPF, DKIM and DMARC checks + score breakdown
  • Suspicious messages isolated in quarantine; admin-approved release workflow

Outbound Relay Settings

To route outbound traffic to the Pitbull relay on Postfix:

# /etc/postfix/main.cf
relayhost = [relay.pitbull.com.tr]:587
smtp_sasl_auth_enable = yes
smtp_sasl_password_maps = hash:/etc/postfix/sasl_passwd
smtp_tls_security_level = encrypt

# /etc/postfix/sasl_passwd
[relay.pitbull.com.tr]:587    smtp-user@domain.com:password

postmap /etc/postfix/sasl_passwd
postfix reload

This configuration passes outbound traffic through the Pitbull outbound filtering engine. SMTP Abuse Radar, per-tenant rate limits and Emergency Outbound Lockdown are activated.

Authentication

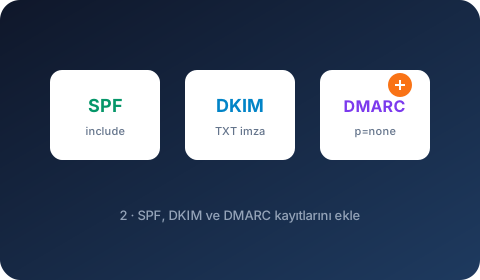
  • Add Pitbull include to SPF
  • Enable DKIM signing from Pitbull panel and publish DNS TXT record
  • Start DMARC at p=none and monitor reports

Operational Visibility

Monitor delivery rates, reject reasons, queue status and GeoIP/ASN distribution on NOC screens. Deliver periodic security summaries to management teams with executive PDF reports.

Smarthost configuration

Outbound relay and MX routing steps

Outbound — relayhost (smarthost)

To route all outbound mail from your Postfix server through Pitbull Secure Gateway relay, add these settings to /etc/postfix/main.cf:

relayhost = [relay.pitbull.com.tr]:587
smtp_sasl_auth_enable = yes
smtp_sasl_password_maps = hash:/etc/postfix/sasl_passwd
smtp_sasl_security_options = noanonymous
smtp_tls_security_level = encrypt
smtp_tls_CAfile = /etc/ssl/certs/ca-certificates.crt

Create /etc/postfix/sasl_passwd (credentials from Pitbull panel):

[relay.pitbull.com.tr]:587    smtp-user@your-domain.com:yourpassword

Then run:

postmap /etc/postfix/sasl_passwd
chmod 600 /etc/postfix/sasl_passwd
postfix reload

Inbound — MX record

Point your zone MX record to the Pitbull gateway:

@  IN  MX  10  mx.pitbull.com.tr.

Add Pitbull sending IPs to your SPF record; DKIM signatures remain on your server and are preserved through the gateway.

Illustrated setup guide

Pitbull integration on this platform is completed in 4 visual steps.

Gateway flow diagram
MX Gateway
1

MX Gateway

Point DNS MX to the Pitbull gateway address.

SPF · DKIM · DMARC
2

SPF · DKIM · DMARC

Add authentication DNS records.

Outbound Relay
3

Outbound Relay

Set Pitbull relay as smarthost / relayhost.

NOC Verification
4

NOC Verification

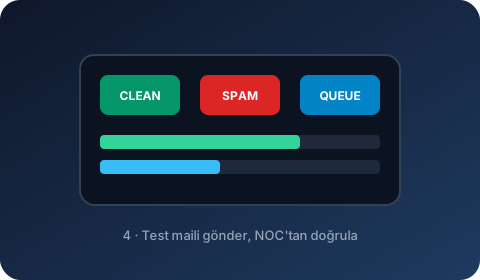
Send a test email and verify in the NOC panel.

Setup steps

  1. 1 Point DNS MX records to the Pitbull gateway address (priority 10).
  2. 2 Add Pitbull include to SPF; generate DKIM TXT from panel and add to DNS.
  3. 3 Set the Pitbull relay address in Postfix relay/smarthost settings.
  4. 4 Send a test email and verify inbound/outbound traffic in the NOC panel.
  5. 5 Start DMARC at p=none and monitor aggregate reports.